WordPress on Steroids: Inject Dedicated GPT Power with OneAI's Widget
A Comprehensive Guide to Building Your AI Agent for WP

Introduction
The web is no longer a one-size-fits-all experience. Studies show that website visitors who receive personalized content are 40% more likely to convert. This is where Artificial Intelligence (AI) enters the scene. By embedding AI tools within WordPress sites, businesses can create dynamic experiences that cater to individual user needs. Imagine chatbots that answer questions 24/7, personalized product recommendations, or even AI-powered searches that understand natural language queries. These functionalities, powered by AI, can significantly enhance website activity.
This guide dives into the world of AI for WordPress, exploring how OneAI's Widget leverages GPT technology to supercharge your website's engagement and user experience.
{{cta}}
Why Integrate Private GPT Widget into Your WordPress Site?
So why indeed should Private GPT Widget become an integral part of your WordPress site? It’s about opening a gateway to transforming passive social media scrolling into active, engaging website exploration. Here’s why making OneAI a cornerstone of your WordPress site is a game-changer for converting social traffic into meaningful interactions and substantial website wins:
Enhance User Interaction with Tailored Dialogues
The widget excels in enhancing user interaction by offering tailored conversations that align perfectly with your specific web content. This ensures that every dialogue is relevant, up-to-date, and deeply engaging, making your website resonate more profoundly with visitors' interests and questions.
Out-of-the-box Multilingual Conversations to Welcome a Global Audience
The internet knows no borders, and neither should your website. OneAI’s Widget facilitates multilingual conversations, breaking down language barriers and making your site accessible and welcoming to a diverse global audience. This inclusivity not only expands your reach but also significantly enhances user experience for non-English speakers.
Better conversion of your SEO pages
Integrating OneAI’s context-aware Widget helps bridge the knowledge gap for users landing on SEO pages, clarifying how your product or solution meets their specific needs. This interaction enhances user understanding and engagement, effectively turning initial curiosity into meaningful conversions.
Leveraging Social Traffic for Enhanced Website Outcomes
Integrating OneAI’s Agent into your WordPress site effectively boosts the ROI of your social media efforts by directing engaged users and shoppers to the most relevant areas of your website. This seamless integration creates an AI-driven agent that converts social traffic into increased website engagement and sales, effectively linking your social presence with your site through engaging interactions.
Leverage AI-Driven Insights for Strategic Content Placement
Through AI-driven insights, OneAI’s Widget allows you to understand your audience better, providing valuable data on user preferences and behavior. This intelligence can help you optimize your content, hence drive highly-engaged users and shoppers to the most relevant sections of your website, ensuring that your content strategy hits the mark every time.
Getting Started with OneAI’s WordPress Agent
From discussing the benefits of the Agent, let's jump straight into building one. With an intuitive setup process guided by our helper Agent—affectionately known as the Agentmaker—creating your own Agent becomes not just a task, but a conversation. Let's walk through this straightforward creation process to see just how easy and transformative it can be.
Step 1: Creating Your Agent
The first step is as simple as clicking "Create your Agent" on the dedicated page. Here, you're greeted with an interface where the initial step involves merely providing your website link.
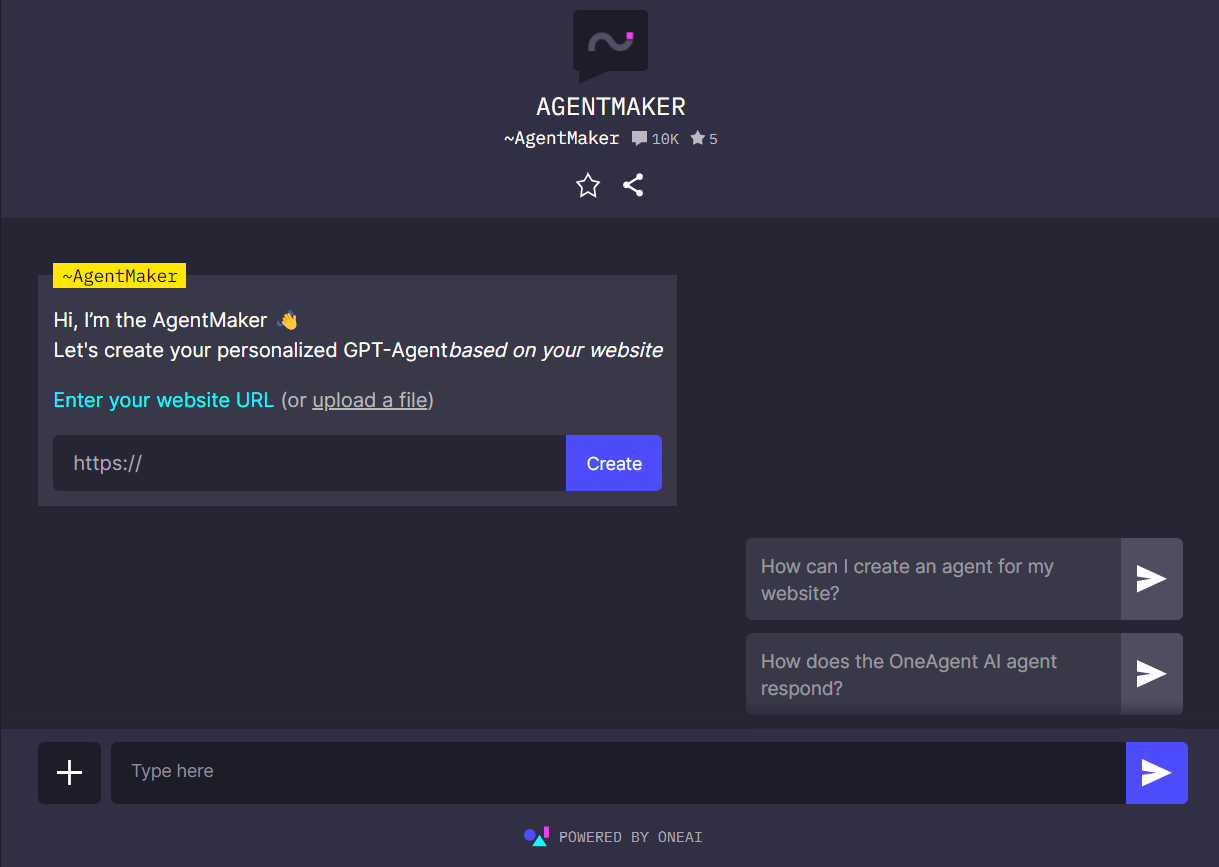
This entity is designed to guide you, answer questions, and assist in tailoring the Agent to your site's unique needs.
Step 2: Agentmaker Interaction and Initial Setup
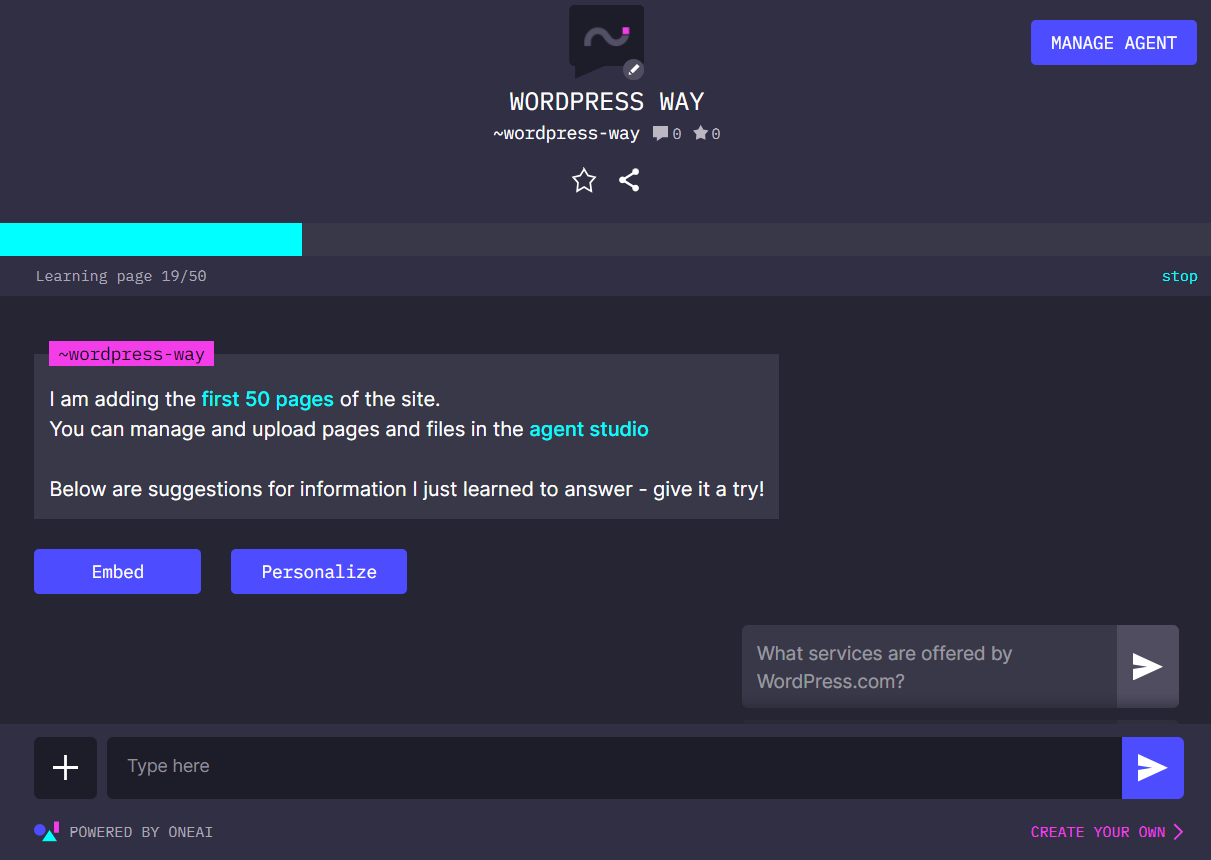
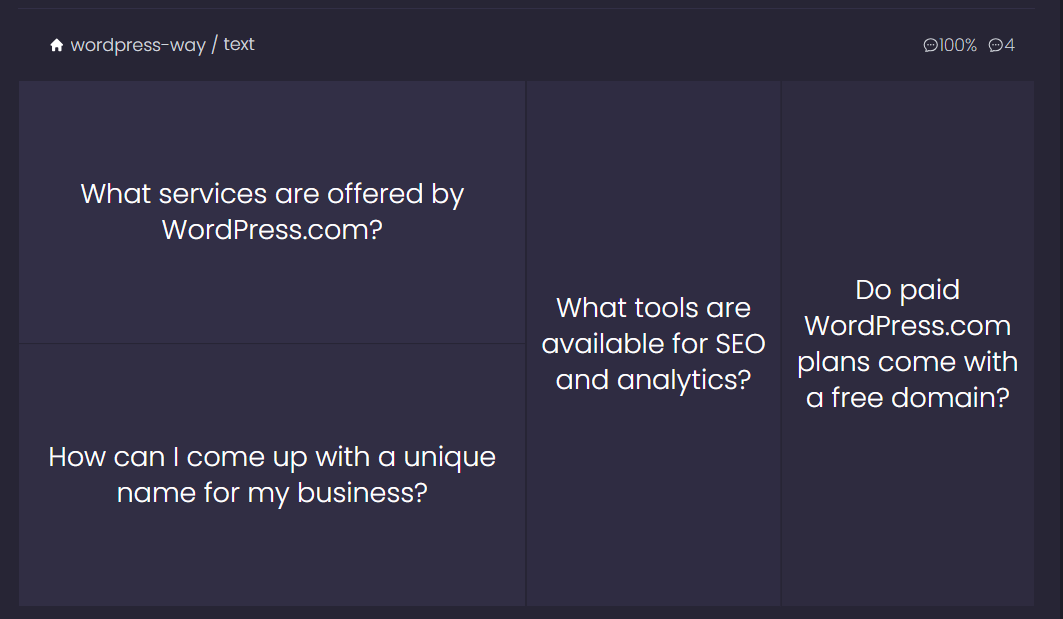
Upon providing a link to your website, such as wordpress.com for demonstration purposes, the Agentmaker springs into action. It begins by analyzing the website, assigning a basic name to your new Agent (customizable to fit your brand), and even suggesting questions you might want to try asking your developing Agent. This process is visualized through a user-friendly interface, offering you a glimpse into the capabilities of your Agent right from the start.
Step 3: Diving into the Studio
The Studio is where the magic unfolds. Here, you're introduced to three pivotal sections: the embed block for your Agent, crucial for its subsequent integration into your WordPress site; a knowledge addition feature, equipped with a progress bar to track your Agent’s learning curve; and the analytics dashboard, offering deep insights into your Agent’s performance and interactions. The “Add Knowledge” button is your gateway into the heart of your Agent’s knowledge base, laying the foundation for its capabilities and intelligence.
These sections are conveniently mirrored in the sidebar, organized into intuitive groups for seamless navigation. This setup ensures a straightforward and efficient process for developing and monitoring your Agent's capabilities.

Step 4: Expanding Your Agent’s Knowledge
In the knowledge base section, a variety of options become available to you. You can view the knowledge you've already uploaded, filter through it, and update or delete as needed.
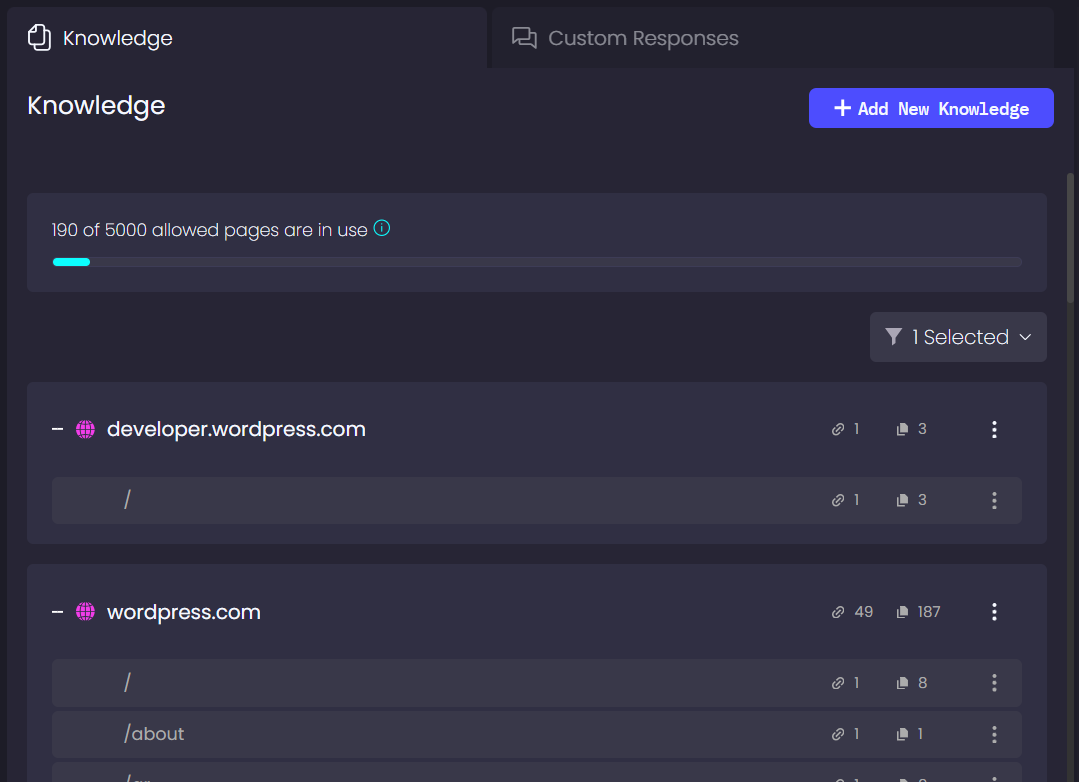
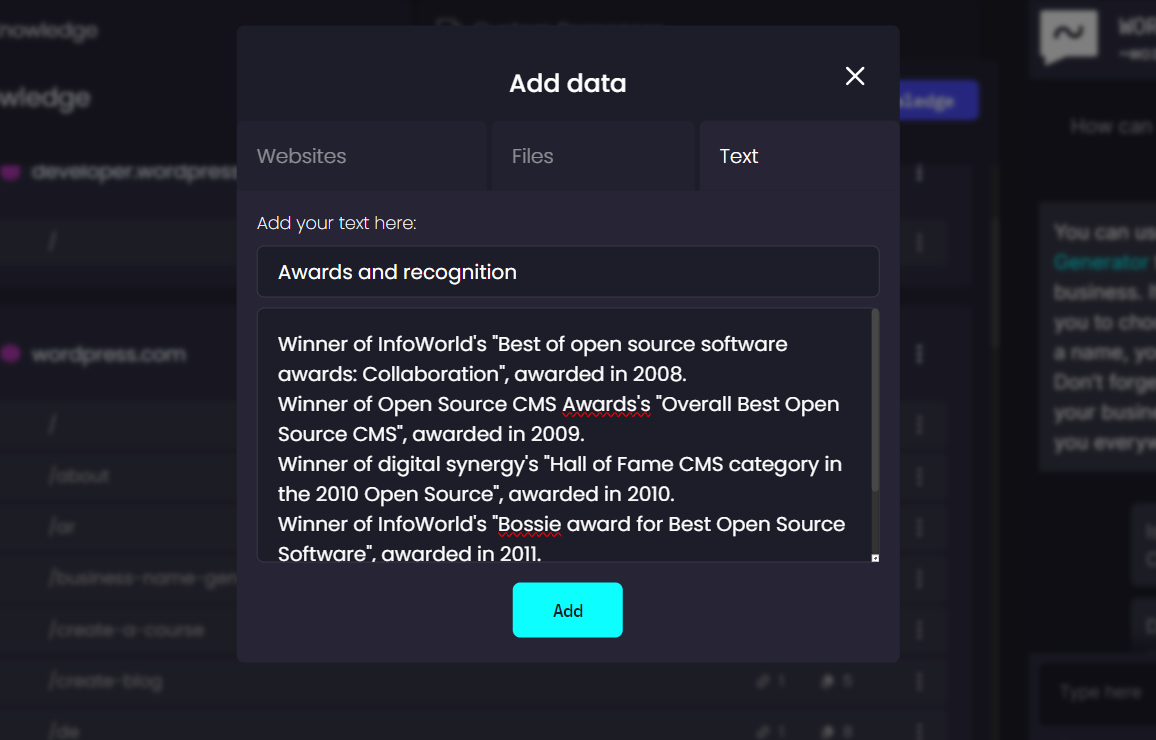
Clicking on the "Add New Knowledge" button opens a window with three options: Websites, Files, and Text. The platform supports a wide range of formats—Docs, PDFs, Tables, etc.—ensuring that no crucial information is overlooked. The Text section is especially valuable for entering precise, specific information that you wish for your Agent to learn.
Step 5: Analytics and Customization
After engaging with your Agent through several suggested questions, the Studio's Analytics section springs to life, reflecting this interaction in real time. With dedicated areas for AI Analytics, Usage Analytics, and an Agent log, you gain insight into the most asked questions, conversation trends, and overall engagement. This comprehensive analytics suite is invaluable for fine-tuning your Agent's performance and relevance.
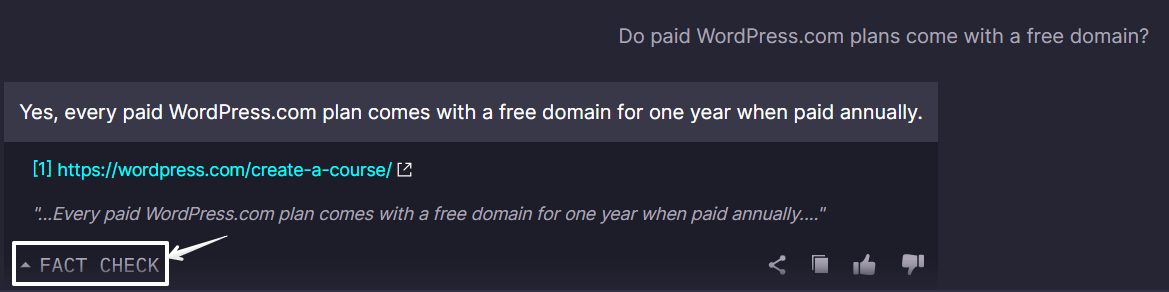
One of the standout features of OneAI’s Agent is its commitment to relevance and accuracy. With the fact-check option, you can ensure that your Agent's responses are not only based on the knowledge you've provided but also verified for accuracy. This builds a foundation of trust between your users and your Agent, making every interaction a step towards a more engaged and informed audience.
Customizing OneAI’s Agent for Your WordPress Site
After setting up our Agent, let's explore the customization possibilities. For this, we turn our attention to the Settings section in the sidebar, where we find three options: Embed on Website, Agent Settings, and UI Settings. Before embedding our Agent, we should first fine-tune it in the Agent Settings.
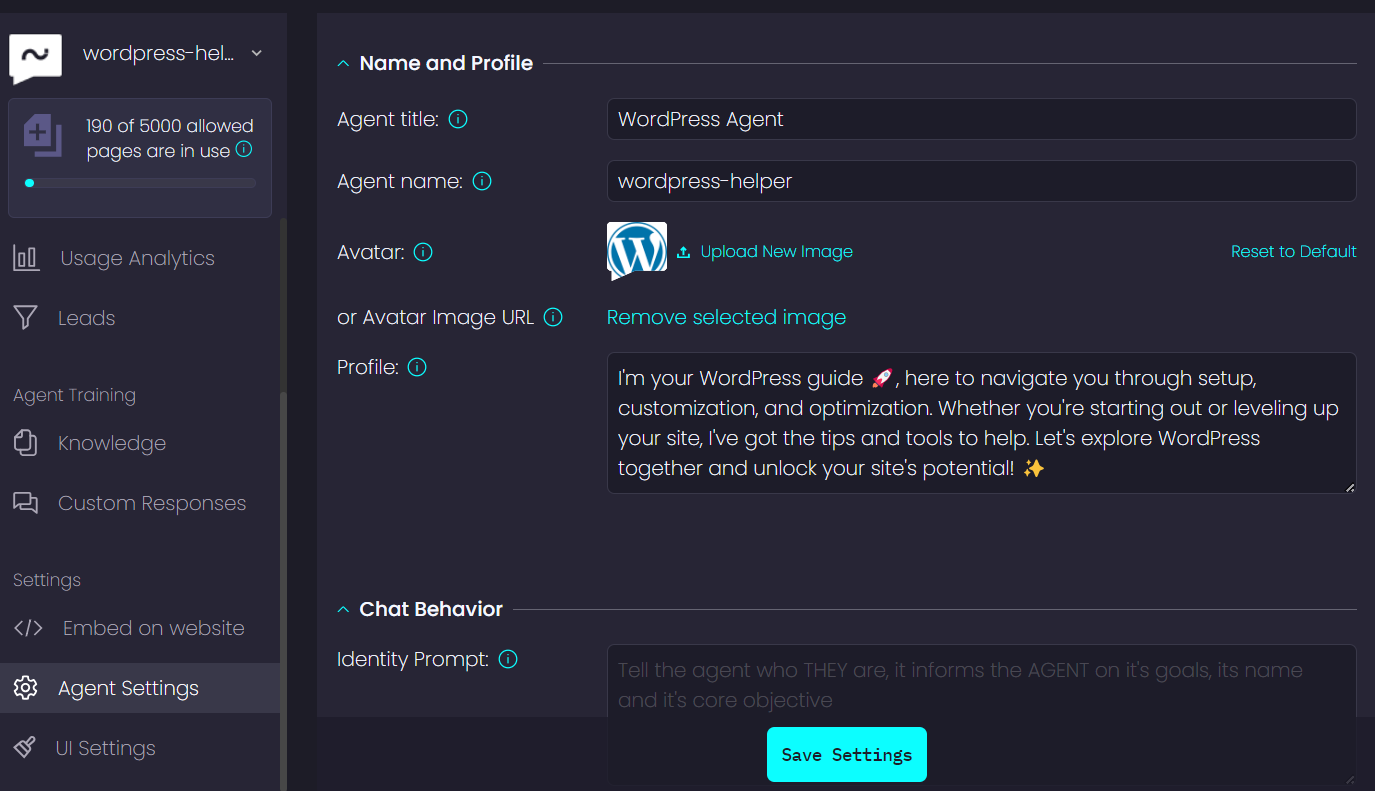
In the screenshot provided, you can see a variety of settings. Here, we can rename our Agent, select a profile picture, and craft a compelling description for the profile section. Additionally, we have the option to define the Agent's Identity, add a behavior description, and set a welcoming message. There are numerous other toggles available, such as enabling or disabling the fact-check option, setting the tone of voice, and toggling suggested questions on or off.
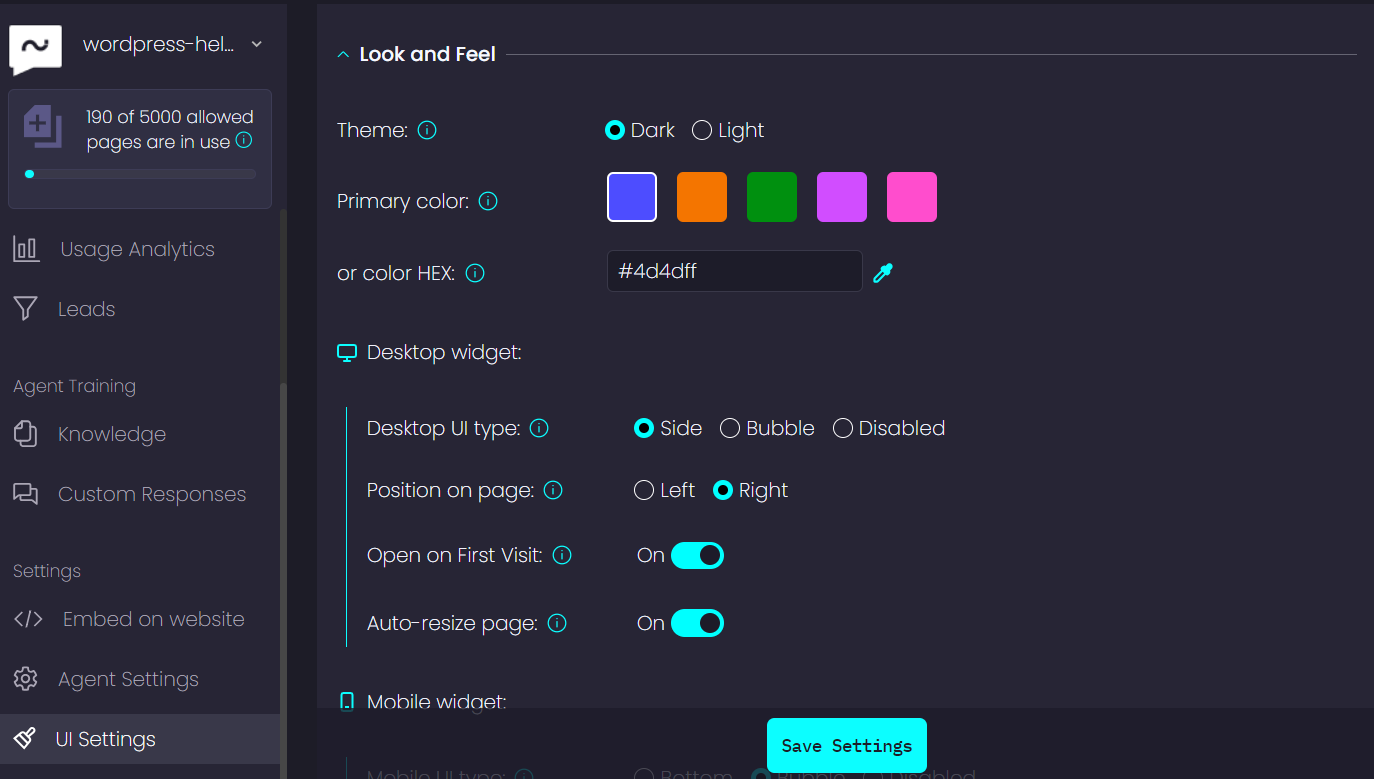
Moving on to the UI Settings, this section allows us to customize the color palette to align with our website, select a theme color, and decide on the widget's positioning on both web and mobile platforms.
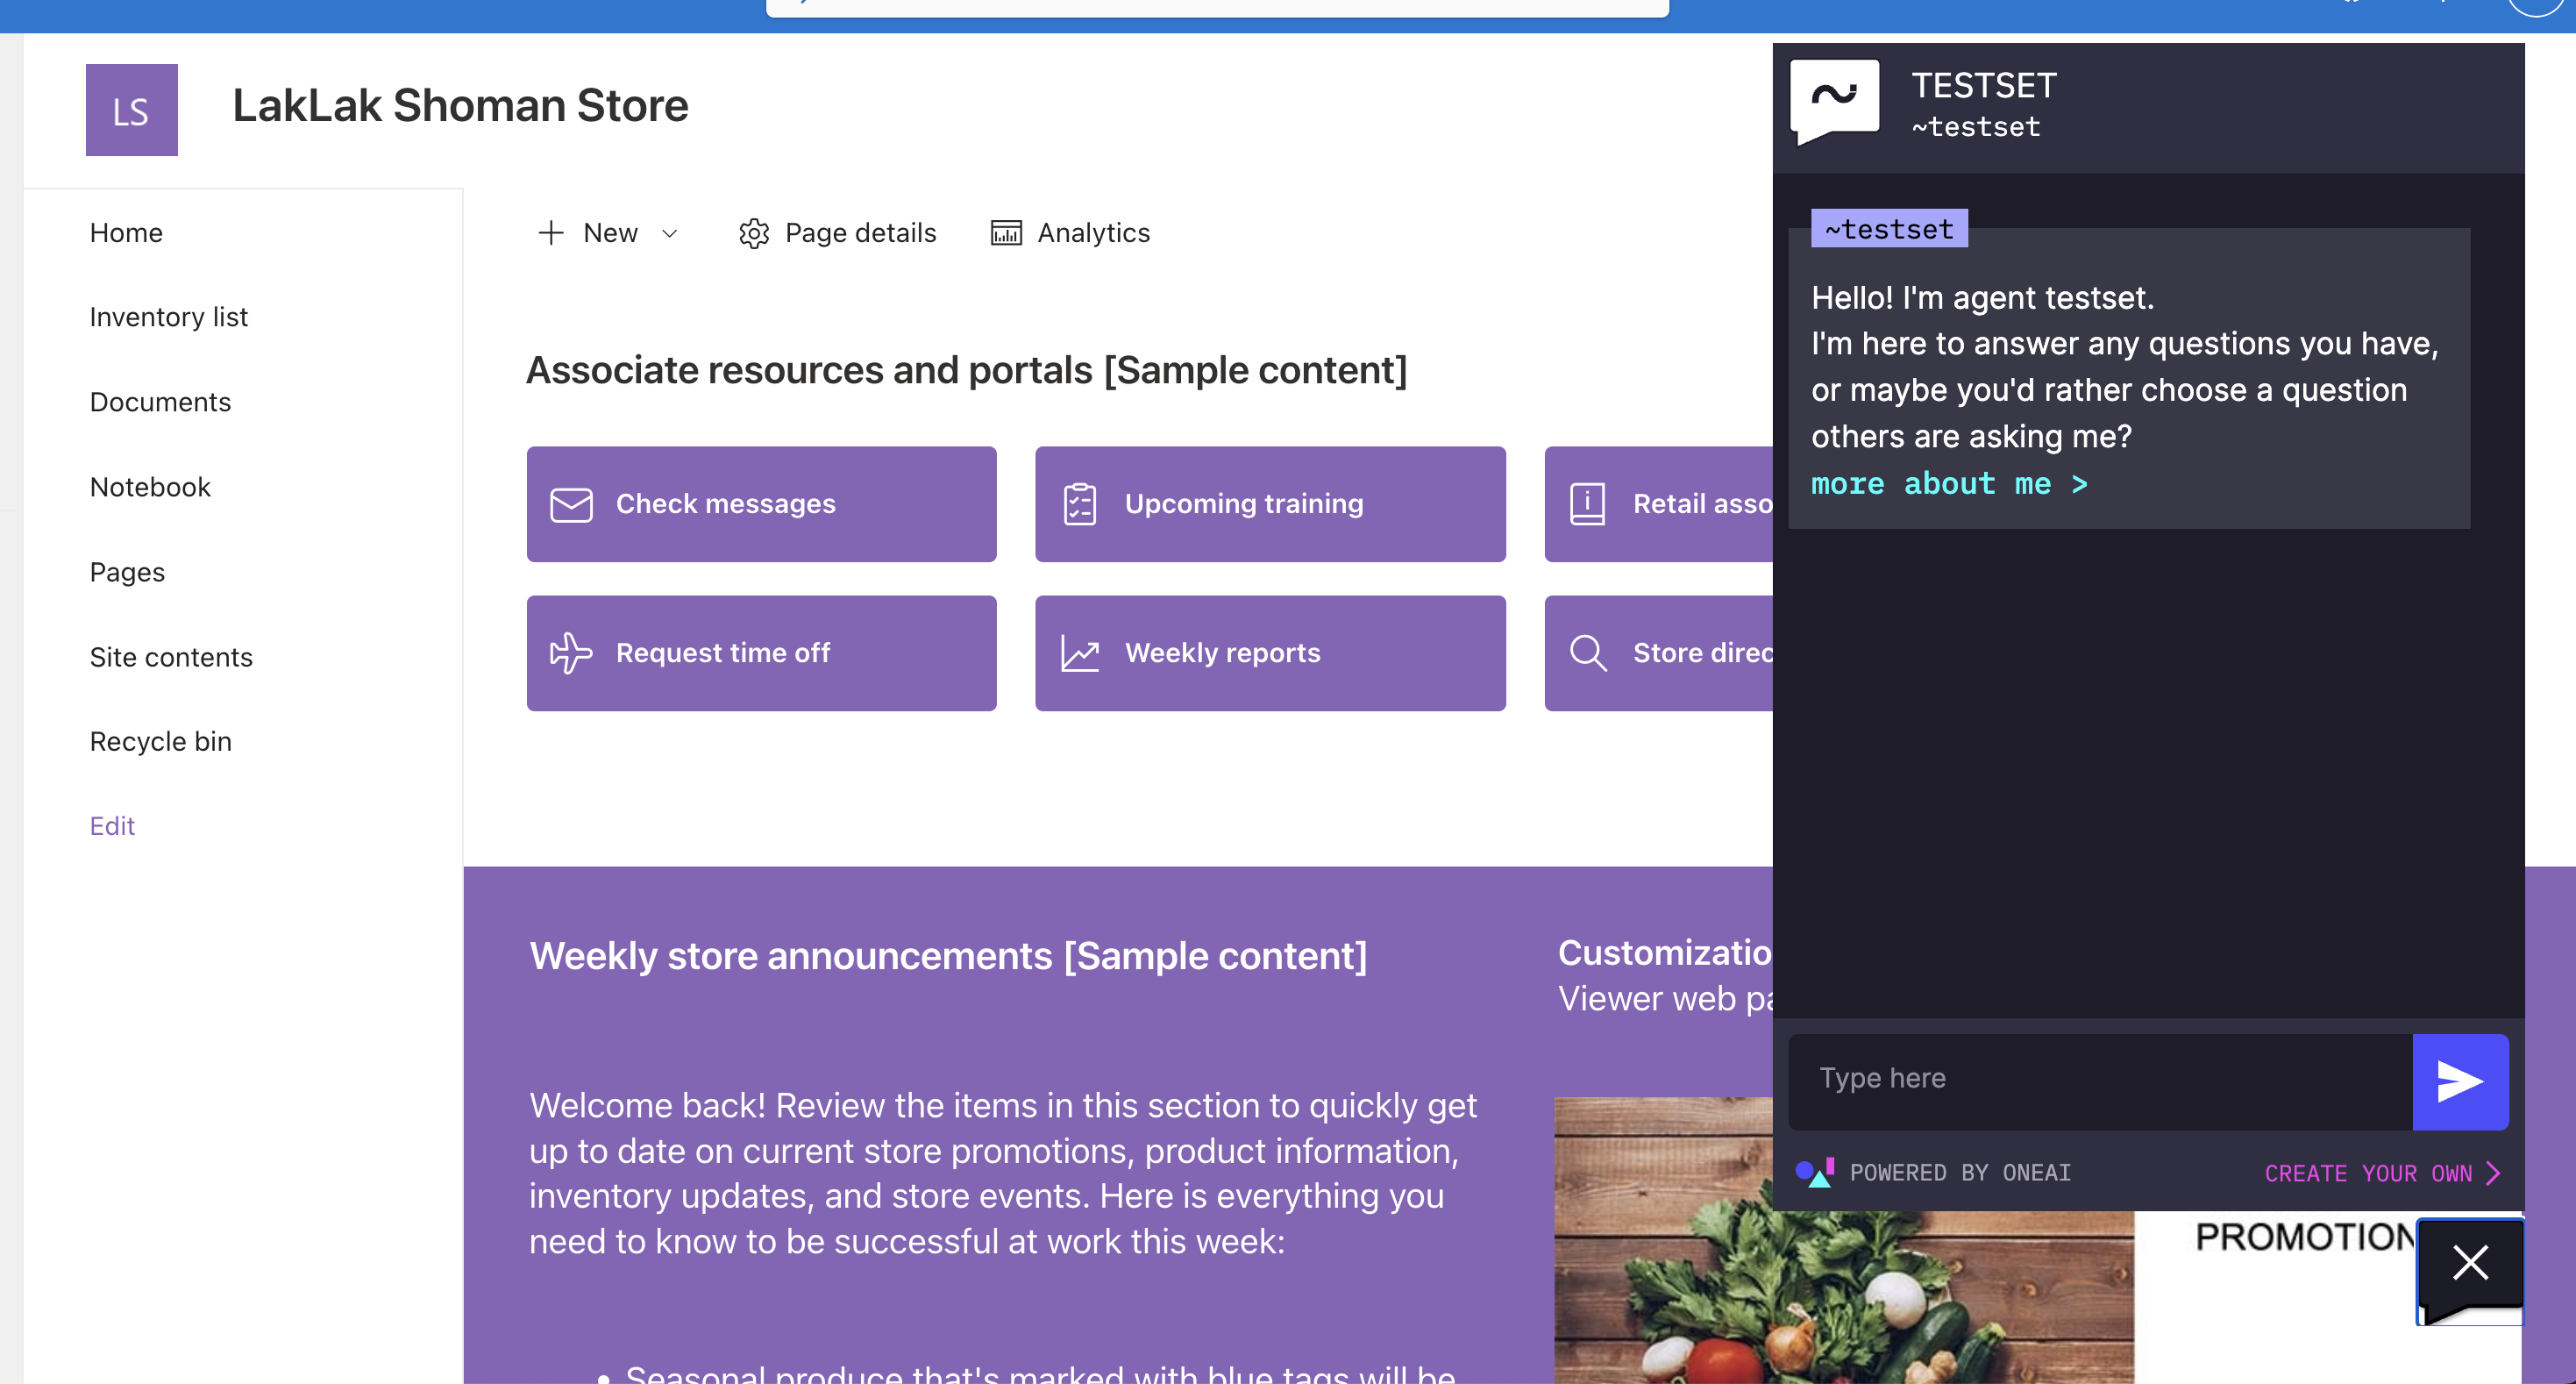
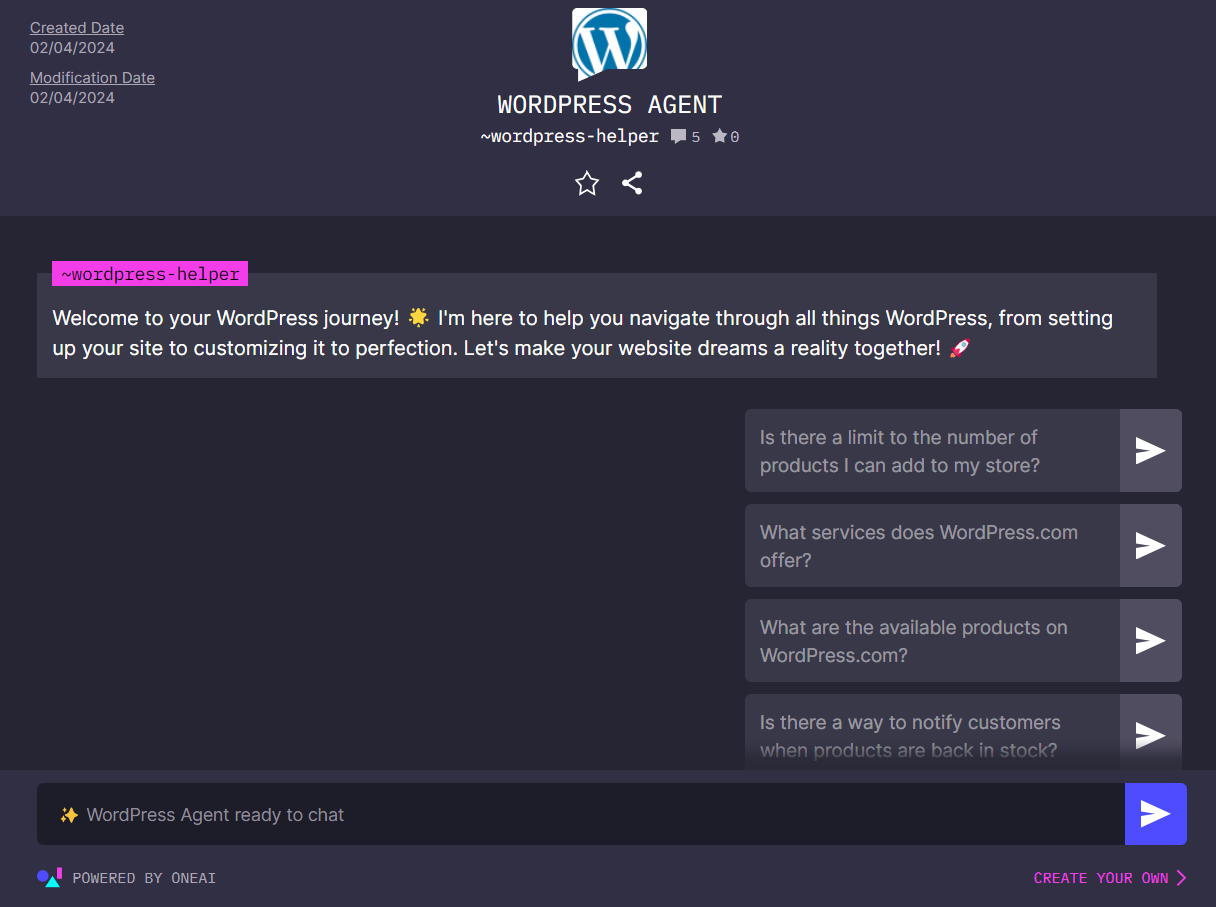
Once we've adjusted all the settings to our liking, it's time to review the final result and see how our customized Agent integrates seamlessly with the WordPress site, enhancing the user experience and engaging visitors with a personal touch. Go ahead and check out the Agent we’ve just created.
Integrating Your Newly Created GPT with Your WordPress Website
Now comes the exciting part: integrating your Agent into your website. In the "Embed on Your Website" section, you'll find a variety of options for integration across different CMSs like WordPress, Webflow, Wix, and other platforms. Our focus here is on WordPress, so let's zero in on the first tab.
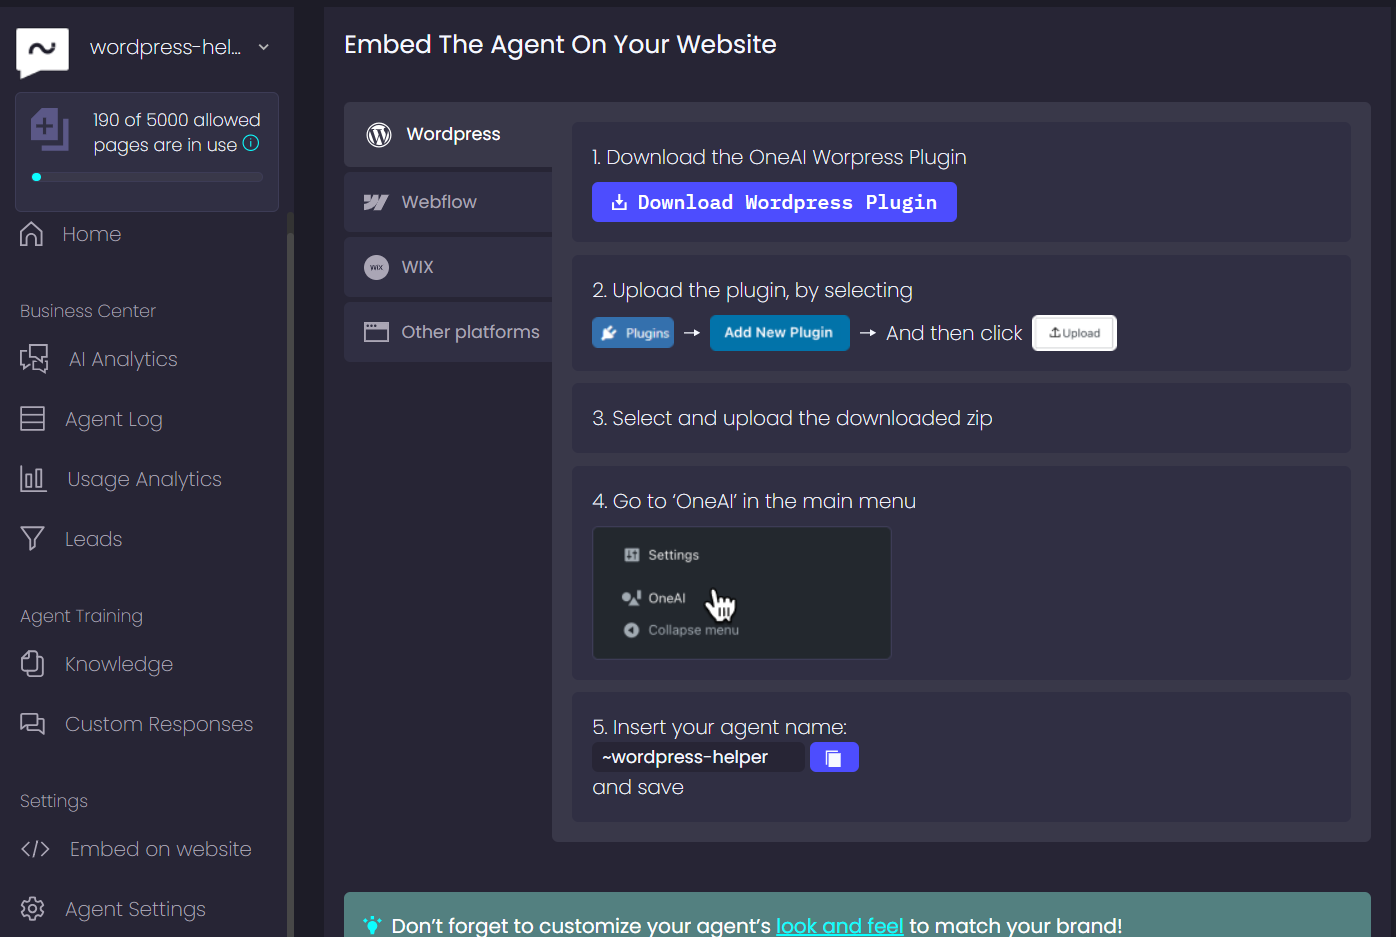
The integration process is as straightforward as adding any other widget to your WordPress site. First, we need to download our plugin. Then, navigate to the Plugins section in your WordPress CMS settings, click "Add New Plugin," and select the downloaded zip file. After installation, the OneAI option will appear in the main menu.
Go to the OneAI section and enter your widget name, in our case, ~wordpress-helper. Then, click "save." Just like that, we're finished with the integration part. Your Agent is now a fully functional part of your WordPress site, ready to enhance user experience and interaction.
Best Practices for Using OneAI’s Agent on WordPress
For optimizing the use of OneAI’s Agent on a WordPress site, it’s essential to focus on strategies that enhance user experience, engagement, and ultimately, website performance. Here are some best practices to consider:
1. Tailor the Agent to Your Audience
Understand your audience’s needs and preferences to customize the Agent accordingly. Use language, tone, and responses that resonate with your target demographic to make interactions more personal and engaging.
2. Keep Your Knowledge Base Updated
Regularly update your Agent's knowledge base with fresh information, ensuring it remains a valuable resource. This includes updating FAQs, product information, and any other relevant content that can improve user interaction.
3. Leverage Analytics for Continuous Improvement
Utilize the analytics provided by OneAI to monitor how visitors are interacting with the Agent. Look for patterns in the questions asked and adjust your knowledge base or Agent settings to better meet user needs.
4. Promote Your Agent
Make sure visitors know about your Agent by promoting it on your site and through other marketing channels. Highlight its presence and capabilities in blog posts, newsletters, and social media to encourage engagement.
5. Optimize for Mobile
Ensure the Agent’s UI is responsive and optimized for mobile devices, considering a significant portion of web traffic comes from smartphones and tablets. Test the Agent’s appearance and functionality across different devices to guarantee a seamless user experience.
6. Integrate with Other WordPress Tools
If possible, integrate the Agent with other WordPress tools and plugins to enhance its functionality. For example, connecting the Agent to your CRM or email marketing service can provide a more cohesive experience for both you and your users.
7. Enable Multilingual Support
If your audience is global, enabling multilingual support in the Agent can significantly improve user experience for non-English speakers. Tailor the Agent’s language capabilities based on your audience's geographical and linguistic distribution.
8. Solicit Feedback from Users
Encourage users to provide feedback on their interactions with the Agent. This can offer valuable insights into how the Agent can be improved and which areas are performing well.
9. Review and Refine Regularly
Regularly review the performance, user feedback, and analytics of the Agent. Use this data to refine its functionality, update the knowledge base, and adjust settings to better serve your audience over time.
By following these best practices, you can maximize the effectiveness of OneAI’s Agent on your WordPress site, creating a dynamic, responsive, and highly engaging user experience that drives satisfaction and conversion.
Conclusion
In this guide, we've discovered that integrating OneAI’s Agent with your WordPress site is not just straightforward—it’s incredibly beneficial. This journey reveals how a simple addition to your site can transform casual browsers into engaged leads. Through OneAI, your site gains the edge it needs to stand out and convert with confidence.